For my addition to Pie Week with my blogging friends, the Theme Weavers, I humbly submit my very rustic looking apple pie.

Everyone needs to stop worrying about making a ‘perfect’ pie crust. I am always hearing that people are scared of making pies because the pastry is just too hard to do. TV chefs and bloggers alike warn about ‘over-working the dough’ as though you are going to end up with a ball of gluten if you knead the dough together a few extra times. Pastry isn’t the easiest of things to make but please stop being intimidated by the idea of making your own pies from scratch and end up with another one of those store bought pies with those manufactured pie crusts that yield a crumbly rather than flakey crust along with overly sweetened filling at Christmas or Thanksgiving. A pie is supposed to be a simple dessert that generally evokes nostalgia-laden thoughts of pastoral living. Just get on with getting the job done and don’t stress so much about all those little rules you have heard people tell you about pie dough. If you are starting to worry that there will be too many cracks or the edges of the pie just aren’t right, let the adjective, ‘rustic’, be your guide.
I follow some of the basic principles of pie making: I use cold water and cold fat, but I don’t obsess over ever detail. I’ve even seen a TV chef recommend chilling the flour. I mean, come on! It is just pie. Granted, the idiom, “as easy as pie” is certainly misleading but let go of the quest for a pie that looks good enough for Martha Stewart (her magazine, not her dreadful Twitter photos).
My pies aren’t always the prettiest to look at but the crust is always flakey and they are stuffed to the brim, and then some, with fruit. Do I sometimes swear when I make pies because the dough cracked or tore as I rolled it out? Yes, yes I do. Does the filling sometimes bubble over and start to burn on the bottom of my oven? You betcha it does! Do I swear some more? Yeppers! Does this stop me from making pies? No. Even if they collapse in the centre because the apples were piled so high (see below for an example of my collapsed pies), these pies are simply much better than anything store bought.
Here are some of my tips for an imperfectly delicious pie:
- roll the dough out between two sheets of wax paper or parchment paper
- use a food processor if you have one – it will save you so much trouble
- put a piece of foil on the bottom of the oven to save you a headache later from any spillage
- brush the edges with beaten egg before putting the top layer on because it will help contain filling ooze
- don’t let the fear of an imperfect pie keep you from making one
- put a damp piece of paper towel under your board so it doesn’t slip around as you roll out the dough
- don’t chill the dough for too long, a half hour will do, because if it is too firm it is hard to roll and will likely crack around the edges. Fixable, but still a pain.
- keep the rolling pin steady with your finger as you hold the handle when the dough is rolled onto the rolling pin for transfering to the pie plate, otherwise it could spin off into a heap. If that happens you will use your whole cussing repertoire. Ask me how I know this…

Pie dough formed into a ball in the food processor.
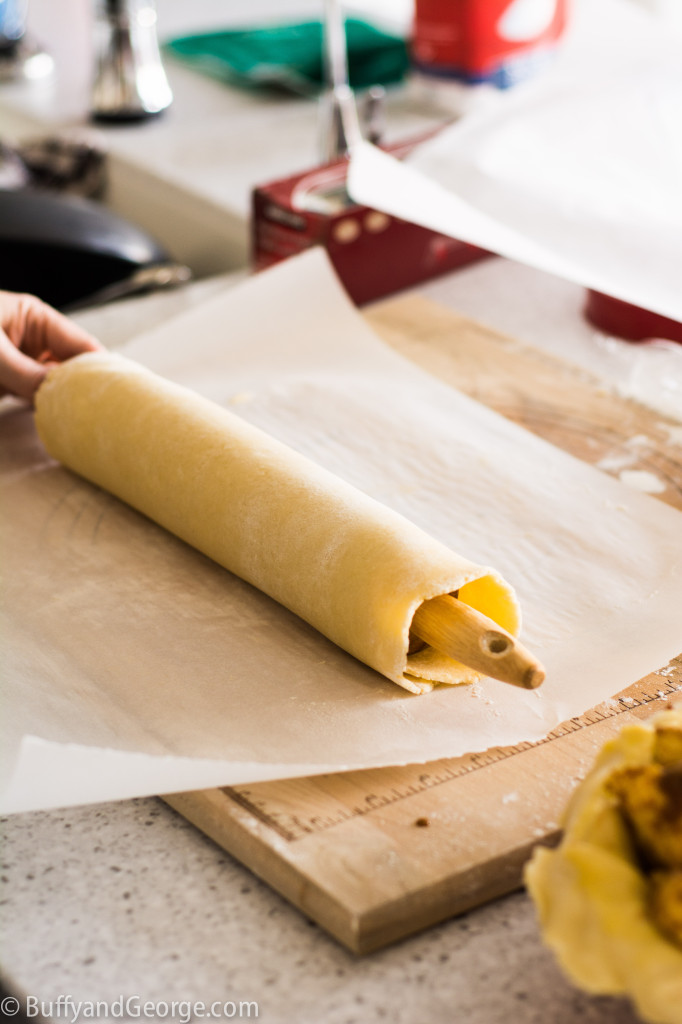
Roll the dough onto a rolling pin to transfer to pie plate.
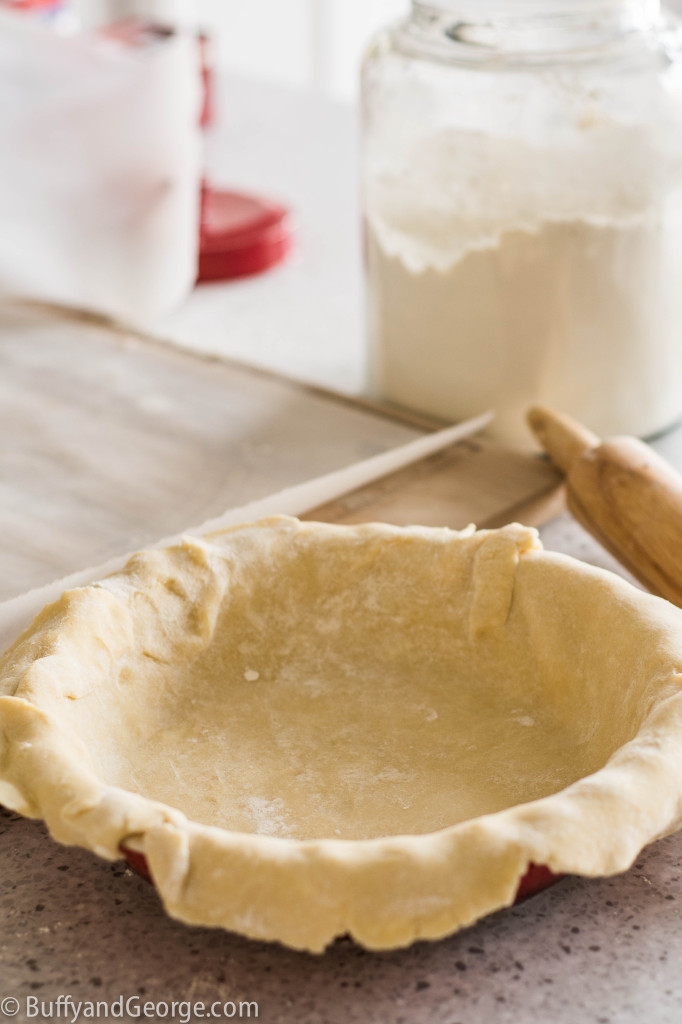
Pie dough is ready for the mound of apples
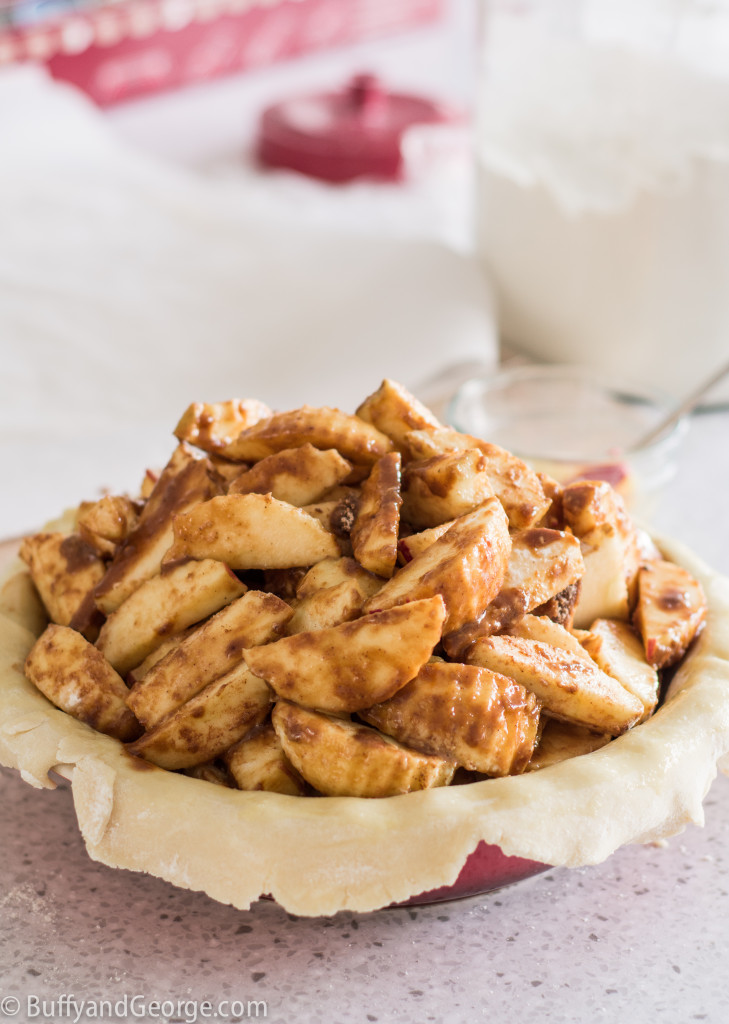
Apples piled high for a deep dish apple pie.

Apple pie brushed lightly with beaten egg, ready for the oven.
Apple Pie
Ingredients
Pie Crust
- 2 1/4 cup all purpose flour
- 1/2 cup cold lard cubed
- 1/2 cup cold butter cubed
- 1/2 tsp salt
- 1 tbsp sugar
- 1 egg lightly beaten
- 1 tbsp white vinegar
- 2 tbsp cold water
Apple Filling
- 12 baking apples such as Northern Spy
- 2 tbsp lemon juice
- 1/3 cup flour
- 1 tsp cinnamon
- 1/4 tsp nutmeg
- 1/8 tsp cloves
- 1/2 cup dark brown sugar more if you like it less tart
- 1 egg lightly beaten for brushing
Instructions
Pie Dough
- In a food processor, pulse the flour, butter, lard, salt and sugar together until you get pea sized pieces of the fat.
- Pour in the liquid all at once and pulse until the dough becomes a large ball.
- Turn it out onto a floured surface and shape it into a ball. Cut the ball in half and shape each half into a disc and wrap each in plastic wrap. Chill in the fridge while you prepare the filling.
Apple Filling
- Preheat the oven to 425 degrees F.
- Peel and core a dozen apples. Cut each apple into eight and toss them in a large bowl with the lemon juice.
- Sprinkle over the flour, spices and sugar. Stir it all gently so that each piece of apple gets coated with the sugar and flour mixture.
Pie Assembly
- Place a large piece of parchment paper on a board or on the counter. Dust it with flour and put one of the discs of dough on it. Dust the top of the dough with flour as well.
- Put another piece of parchment paper on top and begin rolling out the dough. As the dough gets pressed out, lift off the parchment and dust with flour. Turn the dough a quarter turn and use the bottom piece of parchment to lift the dough up so you can dust the underside of the dough with flour. Use the parchment as an extension of you hands so you touch the dough as little as possible.
- When the dough is about 12"-13" in diameter, roll the dough onto the rolling pin. Unroll the dough onto your pie dish and gently fit the dough inside the dish with the excess hanging over the edge of the dish.
- Brush the edge with beaten egg and pour in the apples. Once you get the first layer of apples in, you will need to start strategically placing the rest of the apples so that you can fit the maximum amount in without the apples falling off of the mound.
- Roll the second disc of dough out the same way you did the first. Roll the dough onto your rolling pin and place it over the apples and edges of the bottom layer of dough.
- Gently press the bottom and top layer of dough together. Using a knife, cut off the excess dough. Place your index fingers 1 cm (1/2") apart on the edge of the dough and push the dough up with your thumb between your two fingers. Repeat around the circumference of the pie to create a crimped edge.
- Brush the top with the beaten egg and sprinkle with coarse granulated sugar (optional).
- Bake at 425 degrees F for 20 minutes and then turn the heat down to 350 degrees F for 50 minutes to an hour or until you hear the filling bubbling and the apples are fork tender.
Kirsten / Comfortably Domestic – Mile High Apple Pie
Katie / The Hill Country Cook – New Mexico Apple Pie
Anne / From My Sweet Heart – Cranberry Cherry Ricotta Pie
Haley / The Girlie Girl Cooks – Coconut Cream Pie
Tuesday 11/19
Jeanne / Inside NanaBread’s Head – Black and White Coconut Tart
Mads / La Petite Pancake – Pineapple Pie
Monica / The Grommom – Papaya Pie
Wednesday 11/20
Carrie / Bakeaholic Mama – Chocolate Cream Pie
Kat / Tenaciously Yours – Grandma’s Chocolate Pie
Kirsten / Comfortably Domestic – Maple Sweet Potato Pie with Toasted Swiss Meringue
Thursday 11/21
Shanna / Pineapple Coconut – Boozy Pumpkin Egg Nog Pie
Carrie / Bakeaholic Mama – Sweet Potato Tartlets
Christina / Buffy and George – Deep Dish Apple Pie
Friday 11/22
Madeline / Munchin in the Mitten – Sweet Potato Pie
Allison / Decadent Philistines – Refrigerator Pumpkin Porter Chocolate Pie with Toasted Pumpkin Marshmallow “Meringue”
Lauren / Climbing Grier Mountain – Mini Butternut Squash Pie Stacks with Marshmallow Frosting
Saturday 11/23
Megan / Country Cleaver – Biscoff Pie with Whiskey Mallow Fluff
Shanna / Pineapple Coconut – Persimmon, Pear and Brandy Pie with Vanilla Bean Crumble
Kirsten / Comfortably Domestic – Very Berry Cherry Pie
Oh, sweet mound of apple goodness! You & Kirsten are killing me with your overloaded apple pies this week. I love it! Thanks for jumping in and for not whining when we twisted your arm. The world needs your pie. 🙂
Lol! Thanks Jeanne :). It didn’t turn out to be the prettiest one I’ve ever made and it might have been better if I’d waited longer than 10 minutes after it came out of the oven to slice a piece, but I did eat a third of it yesterday afternoon. We food bloggers have it pretty rough 😉
Love, love, LOVE everything about this post. Love how many apples are included, and how thickly you slice them. Love your debunking of pie crust myths. Love your tips on baking pies. Love your attitude that pies should be pastoral and rustic. LOVE IT ALL! I’m thrilled that you joined in the Pie Week fun!
Oh wow Christina! Perfect pie and perfect crust! Love that gigantic pile of apples in this one! Boy, your crust rolled out so beautifully…I’m going to have to follow all of your great tips for my next pie! : )
Thanks Anne. I hope the tips help. 🙂
Christina, I just loved this post! We have very similar outlooks on pie and pie making. It’s so satisfying to make a pie, and as you say, that wonderfully flaky crust takes a bit of skill but not an advanced degree from Pie Tech. Love your phrase “imperfectly delicious.” Speaking of rustic, when I want a pie, but don’t want to fuss with pie plates and crimping edges, I turn to the ever-so-much-easier crostata. Brilliant concept – a free-form pie, each one its own special shape.
Thanks Marlene. I would like to have the patience to create really decorative and beautiful crusts but I’ve usually gotten tired of getting the pie ready by the end. I am essentially a very lazy cook. 😉 I should definitely make crostadas – seems like my style.